In order to start using the document imaging portion of the WinAA software there are
a few items that you will need to check. First after making sure that the scanner
is Twain compatible (see our Scanner Review article), you will need to install your scanner. You may need to follow
the instructions provided with the scanner for this step. One word of advice that
we have for installing the scanning software, do not load any third party software
that might come with the scanner.
The next thing that you will need to do is configure a folder in which to store
your images. In order to do this you will want to create a folder on your server
that is accessible to all of the workstations. You can either save this folder in the root of the server drive or in the 'AA' folder (the same one that holds the Agency Advantage data). After you have created this folder you have to link it as the image storage path for WinAA. If you would like to use a different drive letter, then you would map your network drive directly to the "image" folder that you created on the storage location. The drive would look like I:\ on the workstations. If you would rather use the same network drive, and all of the workstations are mapped to the server the exact same way, then you can use a longer path for the images S:\aa\images if the workstations were using S:\ as their server drive letter.
Once you have determined which method you would like to use, enter the path into
the WinAA Agency Information screen. Once you are finished with the configuration
you are ready to begin scanning your first image. You may want to test your scanner
to make sure that it is working correctly with its Twain drivers before attempting
to scan in WinAA. The easiest way to do this is to scan a document from Imaging
for Windows, Irfanview, or Paint. Once you have determined
that it is working from this software you will want to go into WinAA to perform
your first scan.
Please note that the following intructions are for scanning in individual pages within one customer folder at a time. If you are scanning large amounts of documents try our Batch Scan utility. If you are trying to import existing documents into your Agency Advantage, try the Batch File utility.
Once you have WinAA opened, go to Customer Folders from the main menu. Here you
will select the customer that you will scan the image for. Open the customer folder
and click on the Attachments then Images tab.
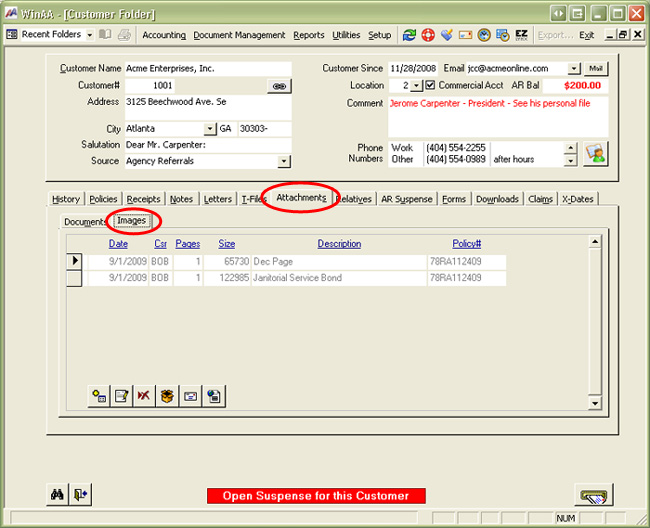
Next you will want to click on the Add button. You will see a pop-up window similar
to the one pictured below.
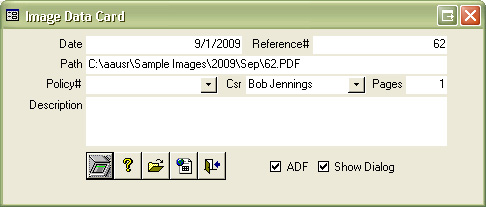
On this screen you will see the image storage path, reference number and today's
date. The number of pages to be scanned, policy number and description will need
to be entered. Most TWAIN compatible scanners today use an Auto Document Feeder so you will need to check "ADF". Check "Show Dialog" box if you need to configure the settings on the scanned document, like color or greyscale, and DPI resolution. Once this information has been filled out, click the scanner
button and the scanners TWAIN software should appear. From here you will need to
follow the instructions that came with your scanning software. Once the documents
are scanned the scanner software should close and you will see and entry under images
for that document.
Additional Tips: When scanning regular text-only
documents make sure that the scanner is set to black and white instead of color. Also, set your DPI to 150 or 200. This will help decrease the file size and also allow for faster scanning speeds.
Also see:
Batch File
Batch Scan
Selecting a Scanner
Written by: Cale Parish
Updated by: Tina Stewart
Back